

 5697
5697
WELCOME
Welcome to our Sample Management - All-in-One Solution survey platform. As an Operator user you can access all the options and see all the tabs of the platform.
Platform Login
To enter the platform you must have a username and password.
Platform URL

Main Menu
It shows all the tabs we have to manage as a Operator user.
Here we continue with the detail of each tab:
Home – DashBoard
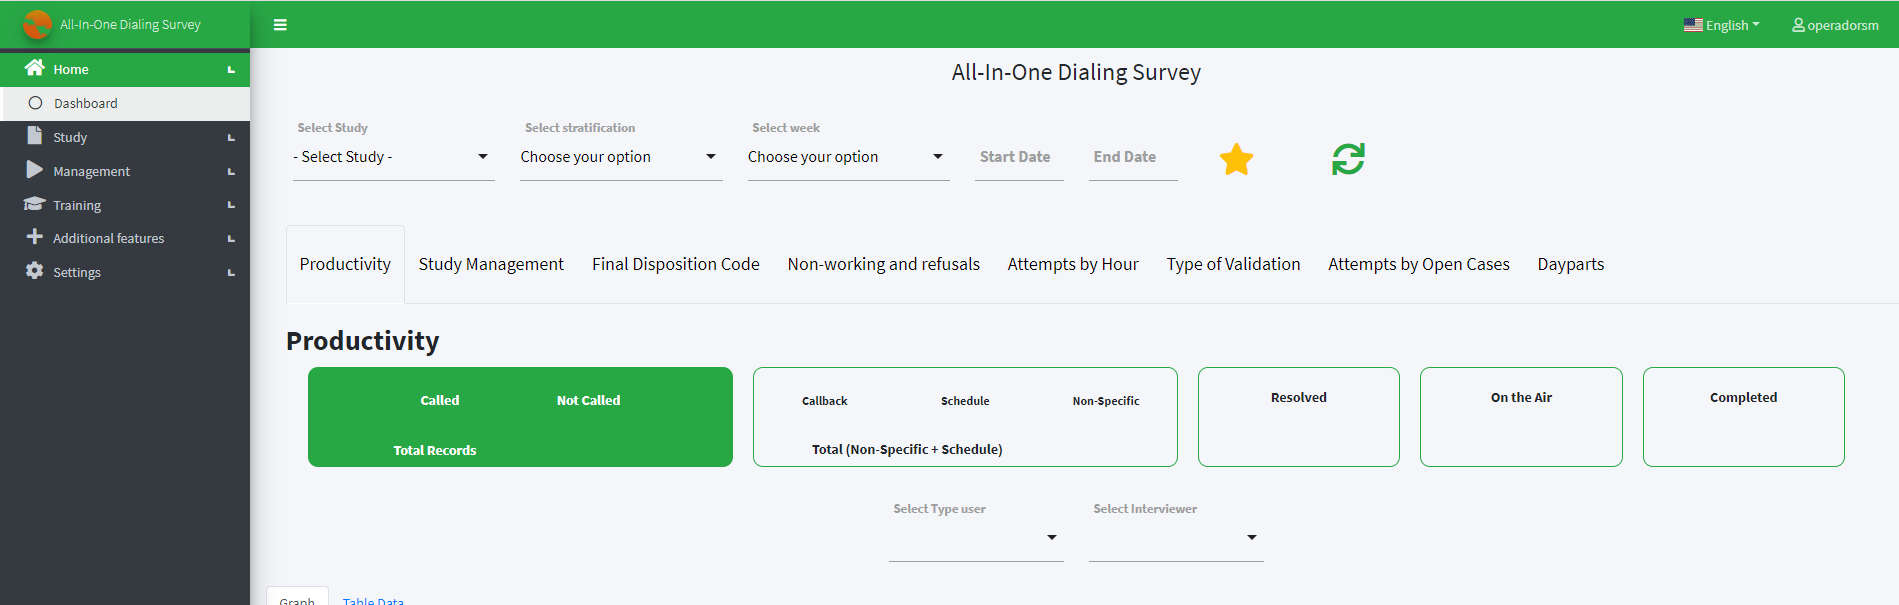
In this first view you can access the Dashboard of the Sample Management Platform - All-in-One Solution. Here you can see a summary of the surveys carried out during the day, all synthesized by Study.
You have the option to select by: Study, stratification, week and dates.

Completed and selected fields.

You have the main option of selecting the Study and being able to visualize the details of that selection.
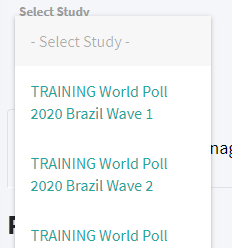
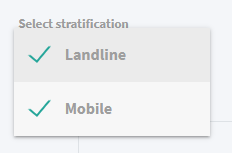
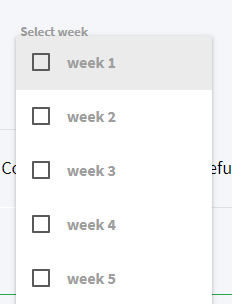
You have to apply different filters for a specific detail:
Filter by type of Strata
Filter per week
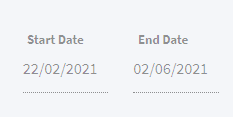
Filter by Start Date and End Date
After selecting and completing all of the modules, the results will appear in the following panel:
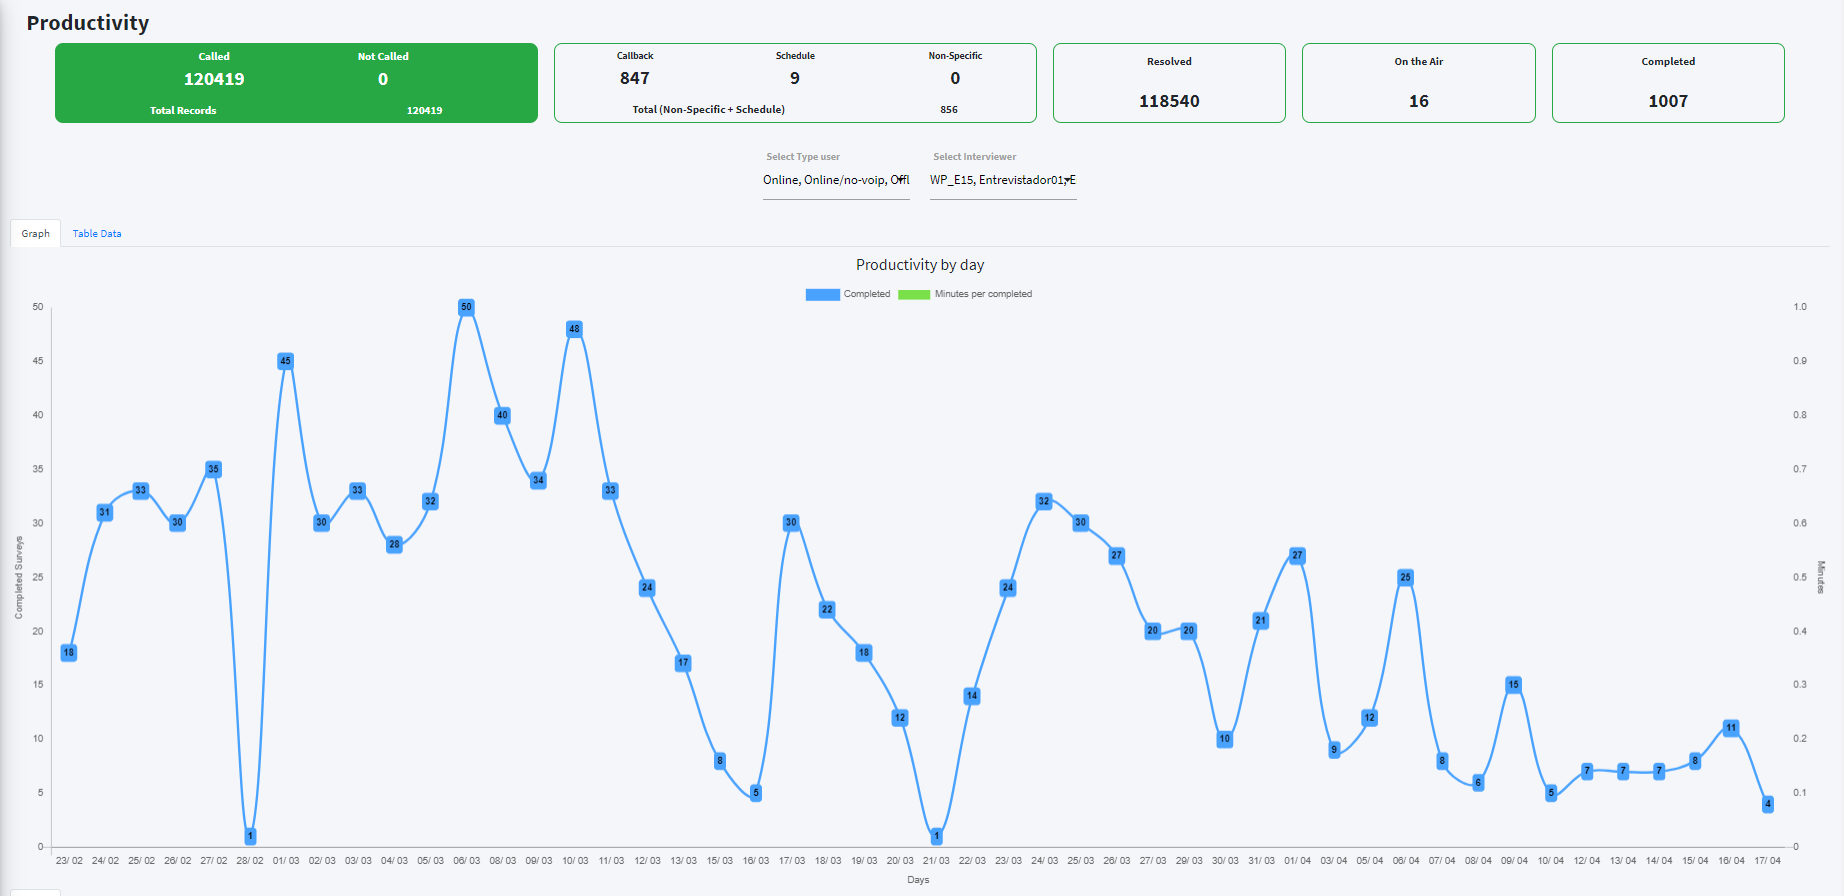
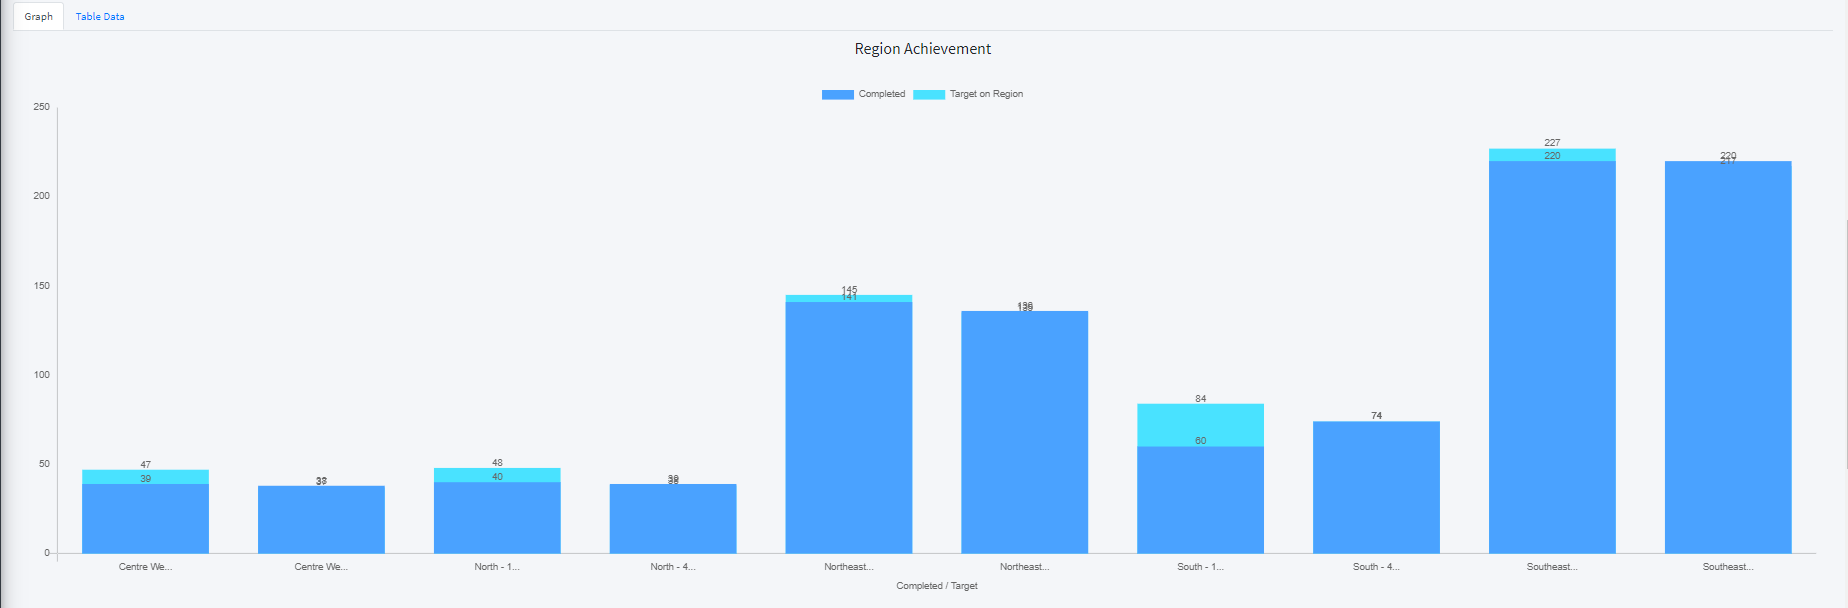
You can select to see results: Productivity.

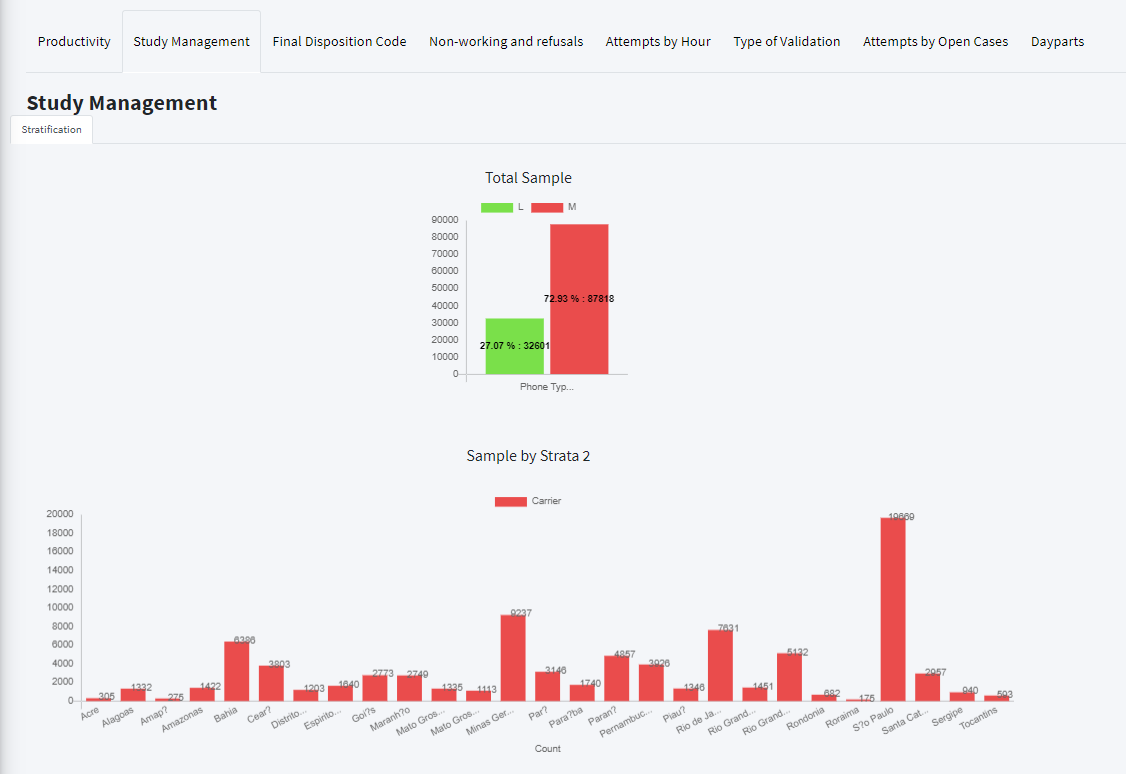
You can select to see results: Study Management.
You can select to view results: Final Disposal Codes
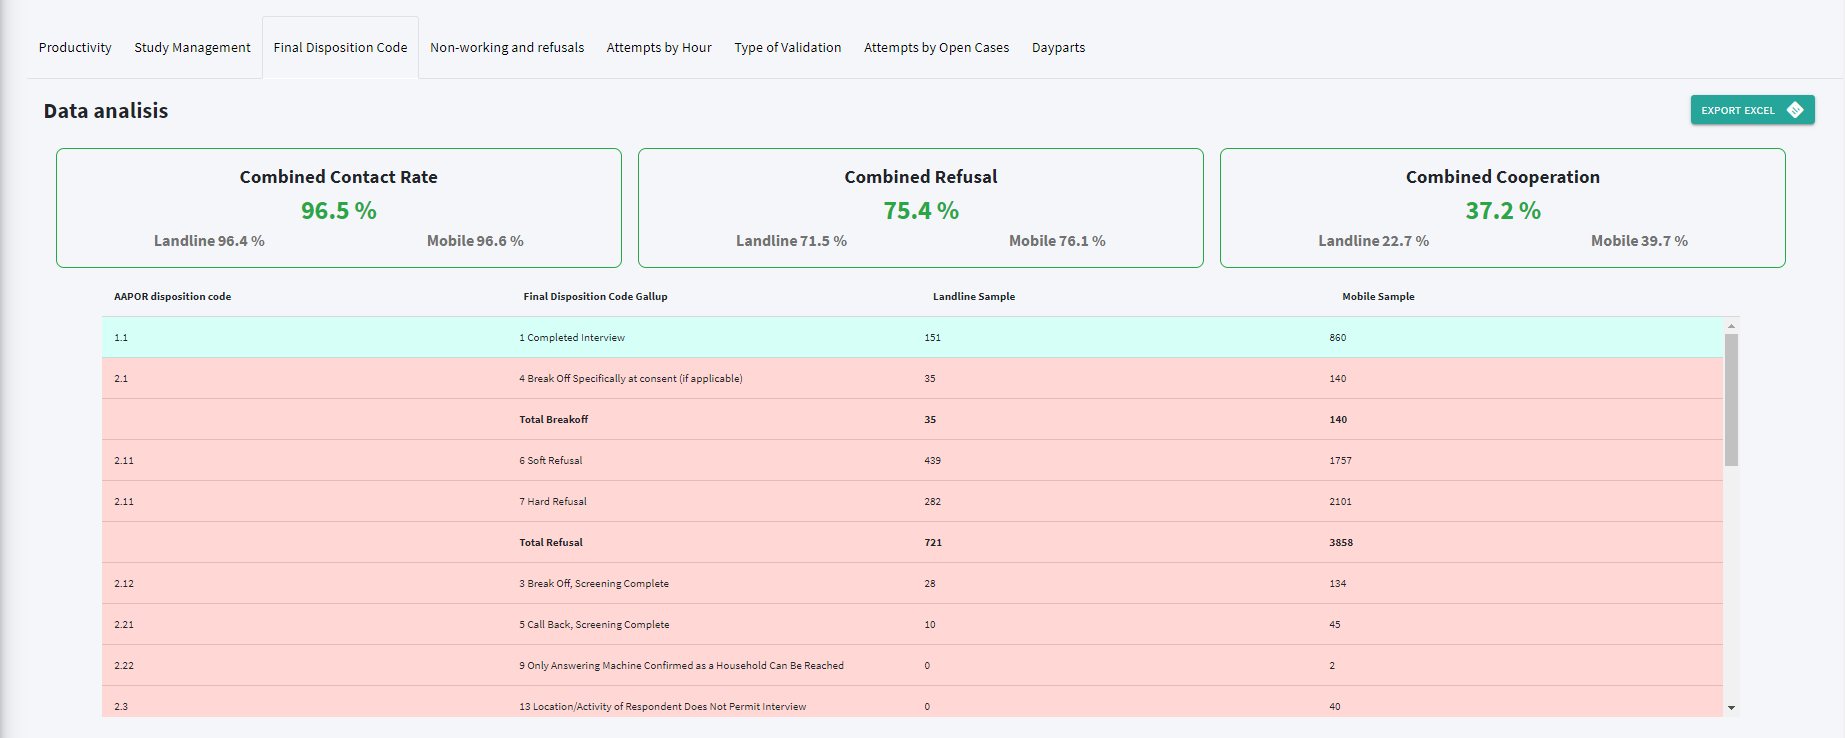
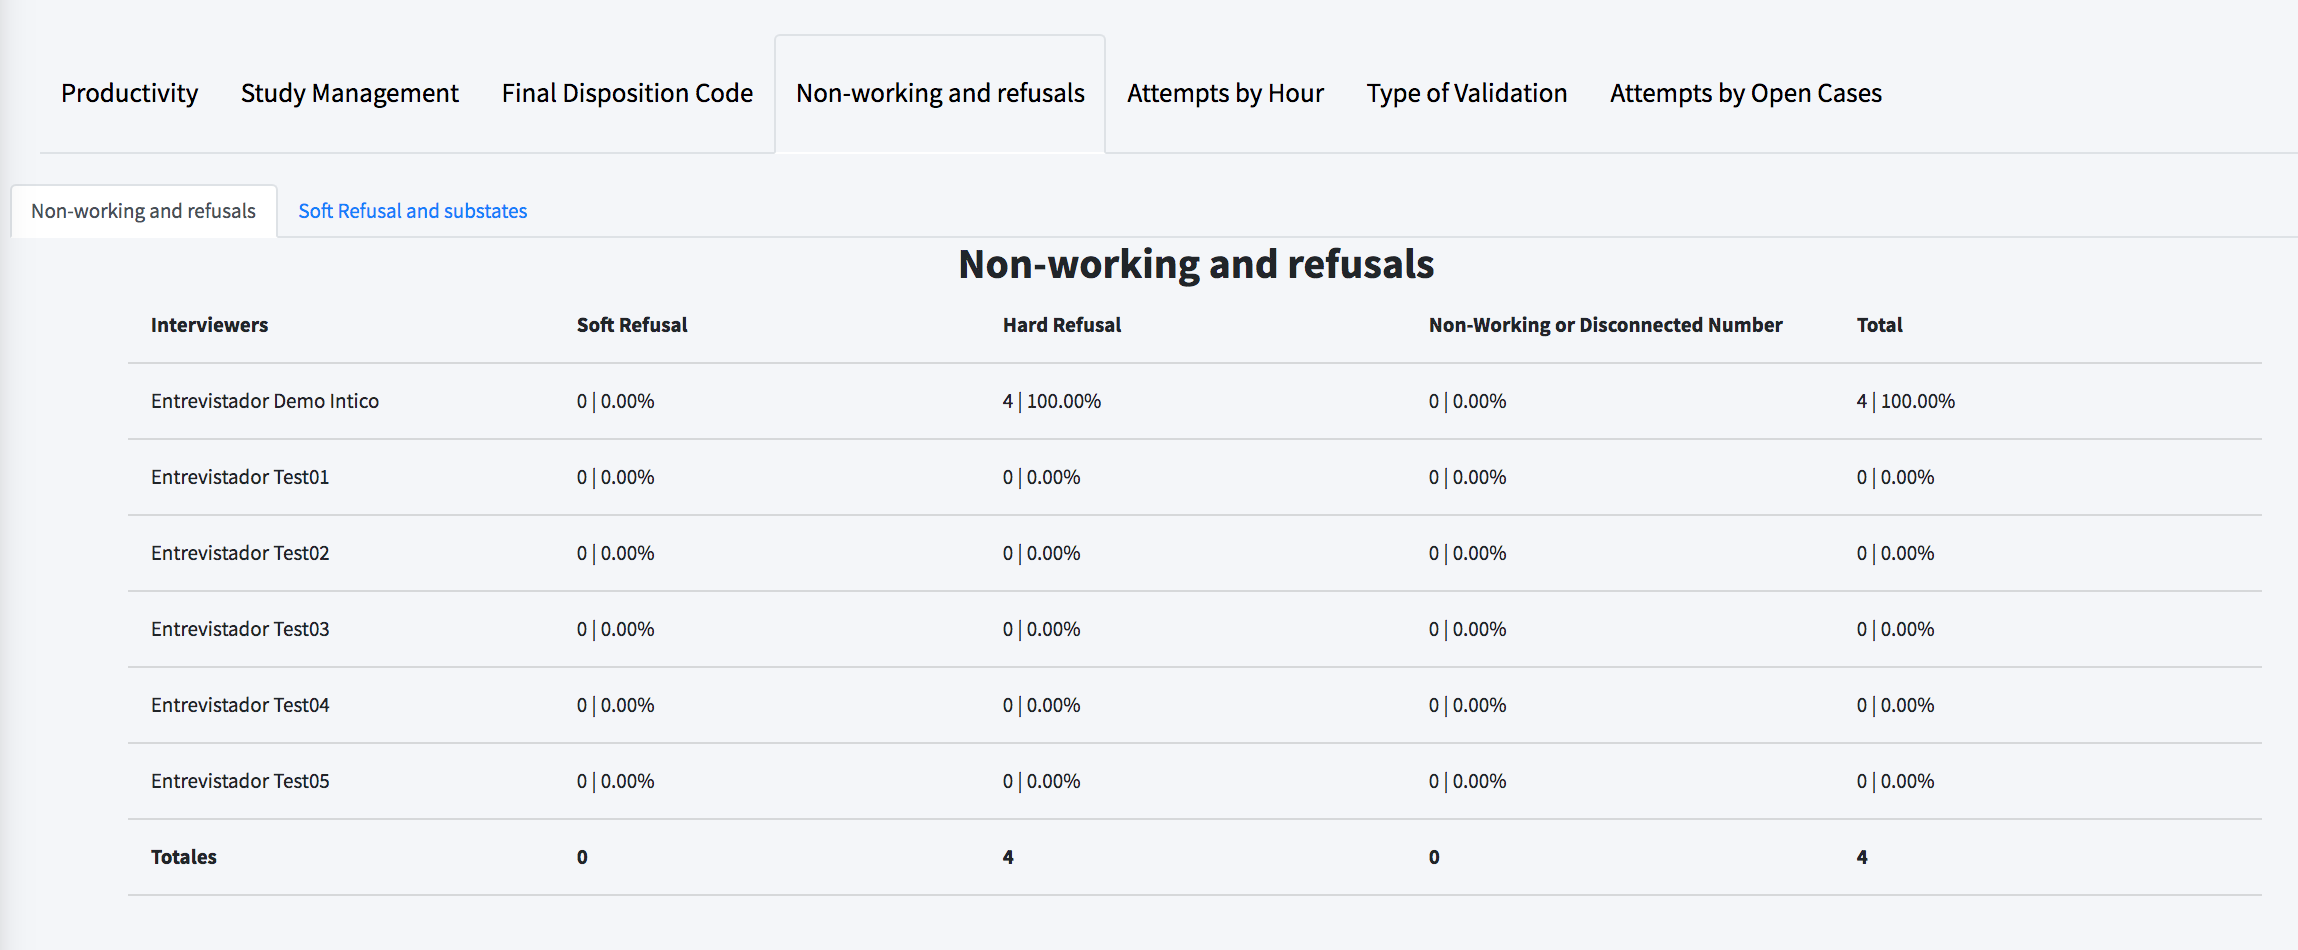
You can select to see results: Non-working and Refusals
Doesn't work and Rejects
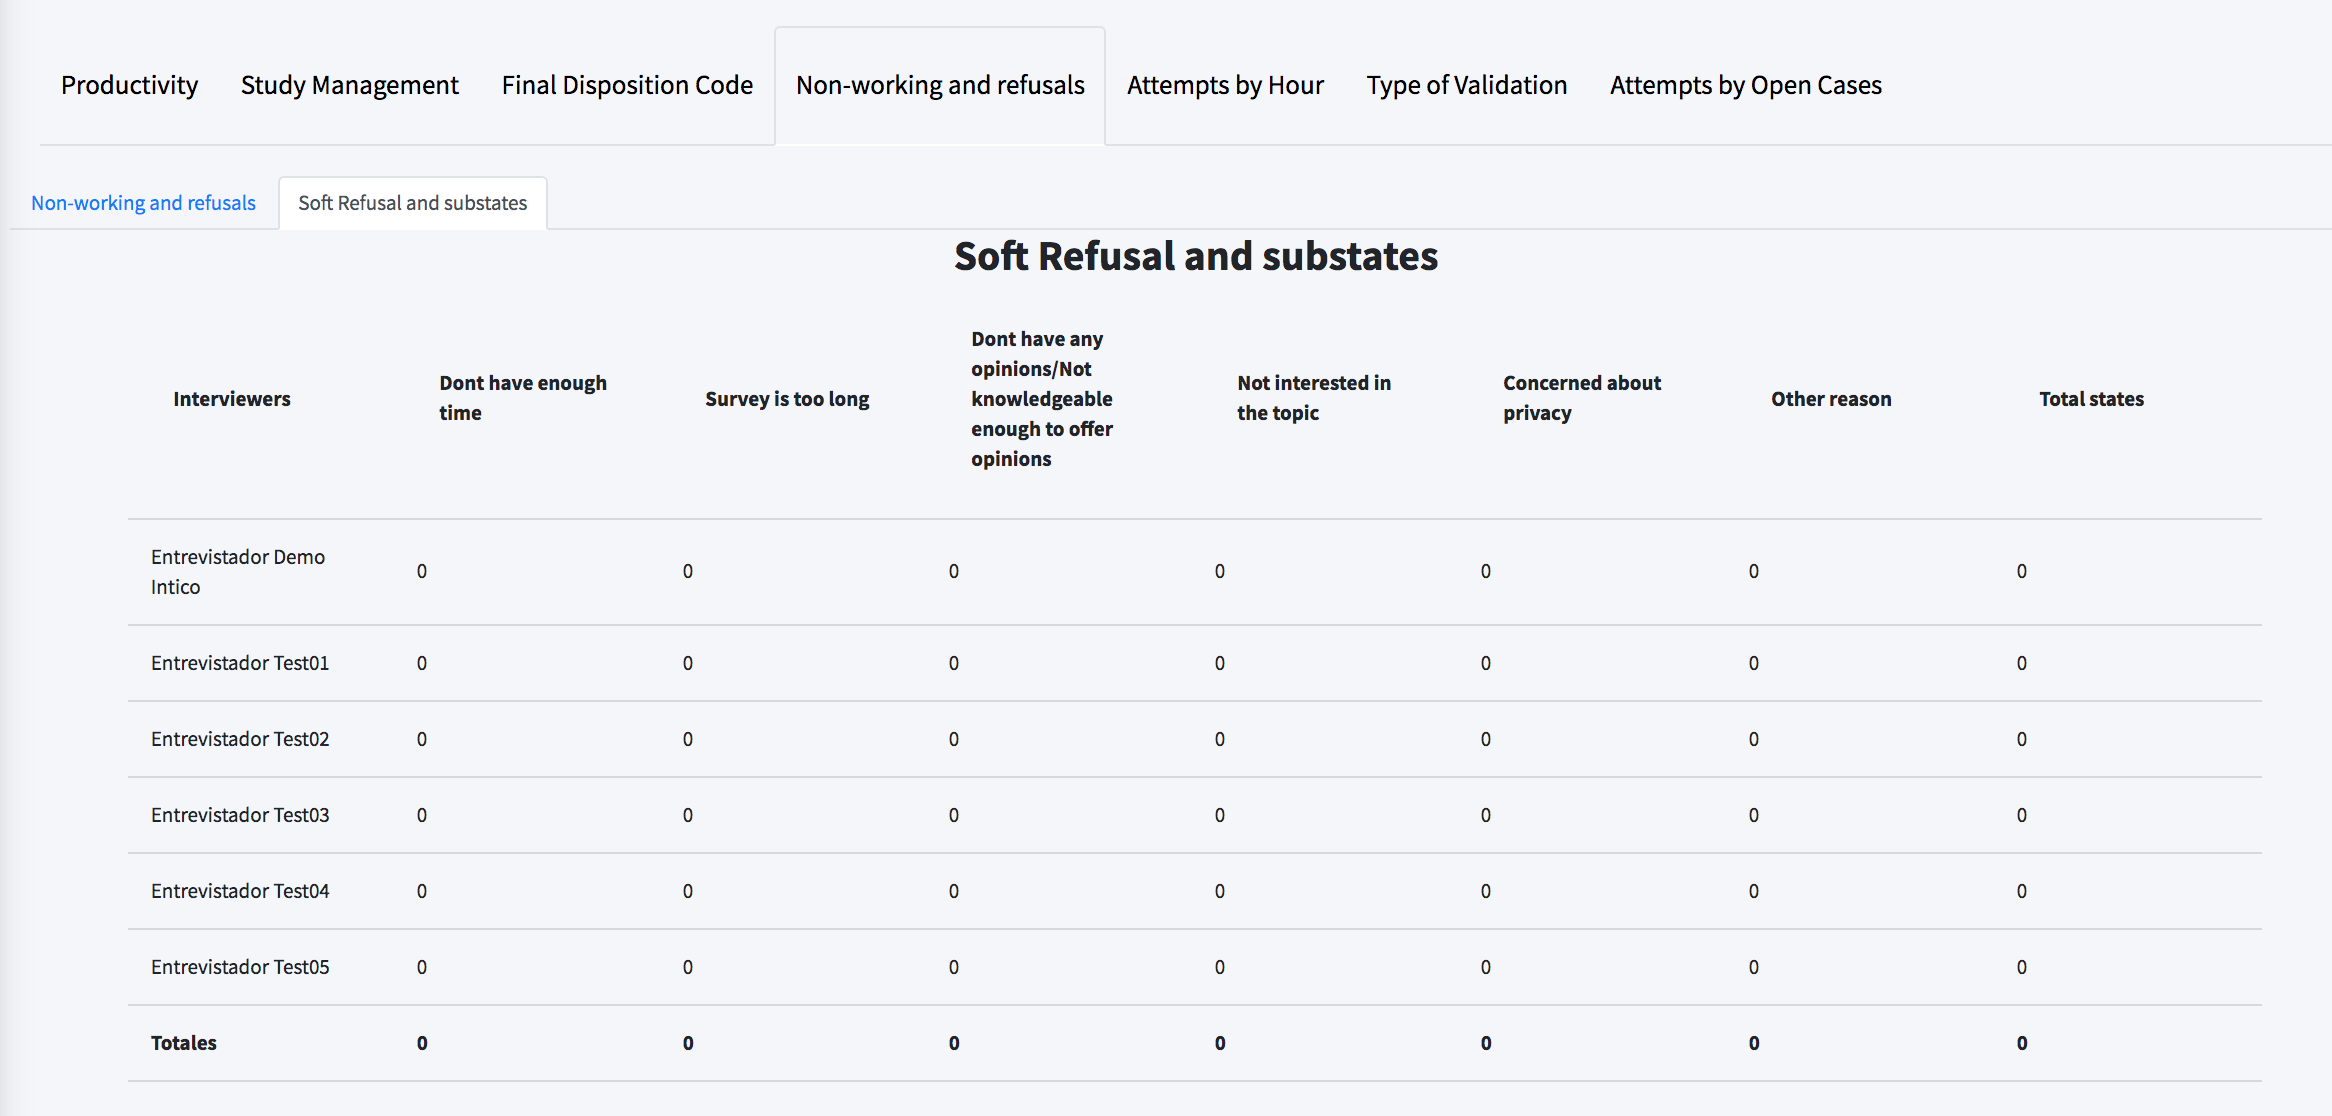
By Soft Rejects and Sub-Status
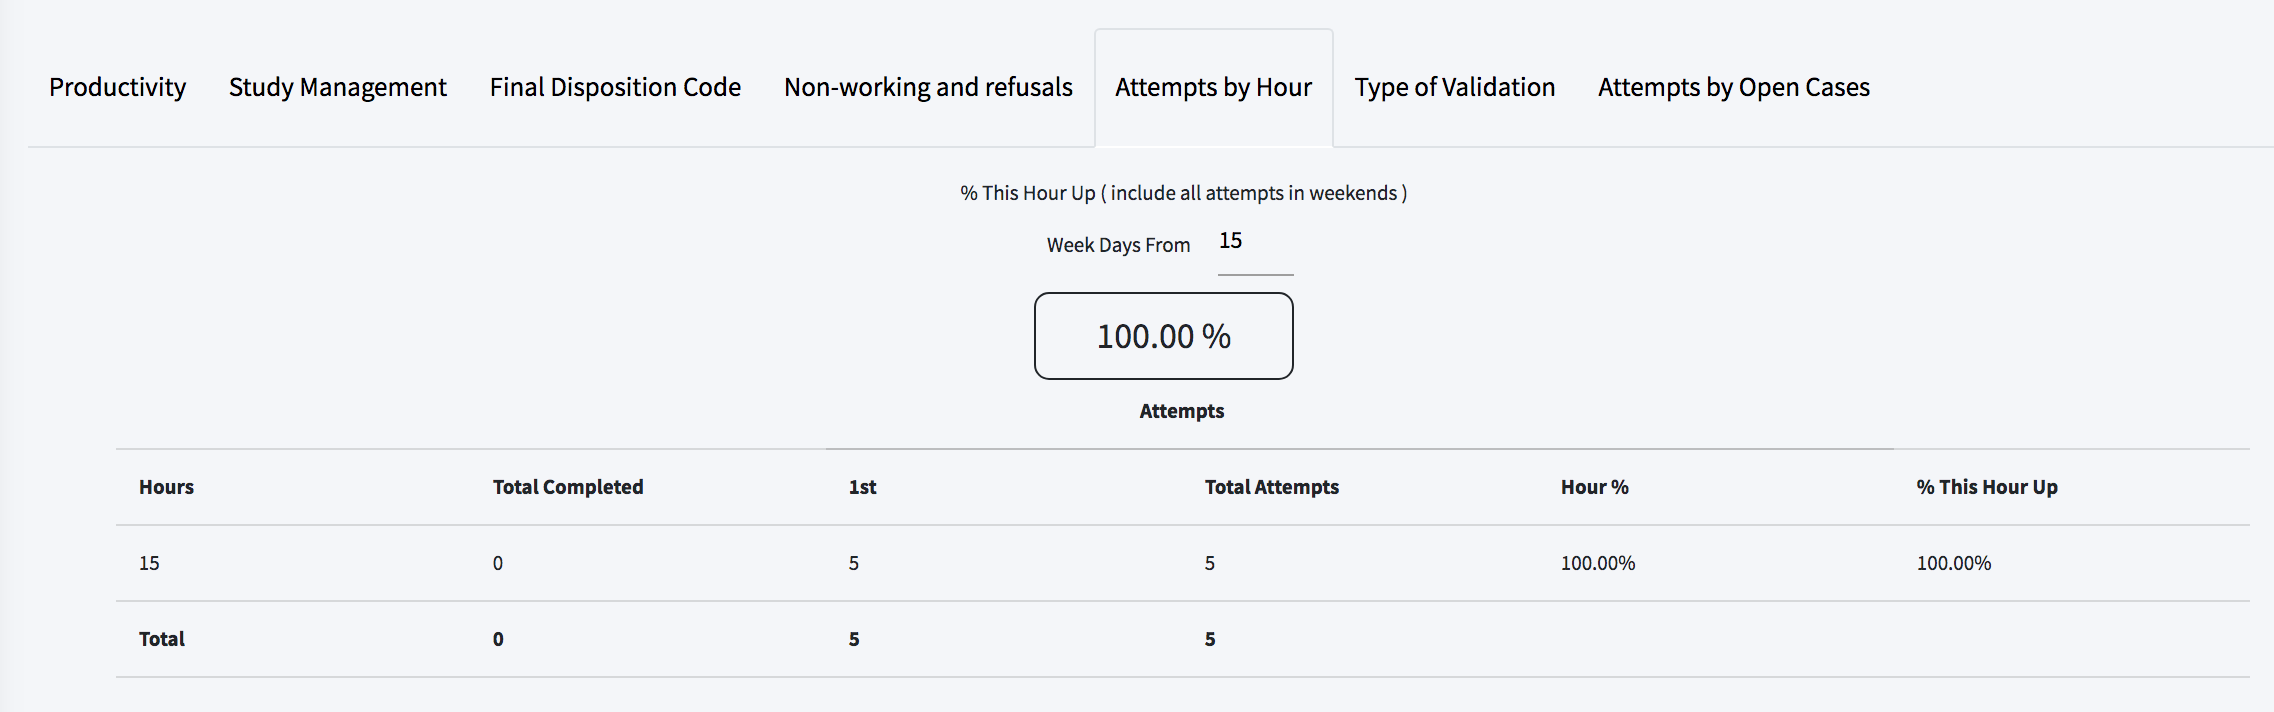
You can select to view results: Hourly Attempts
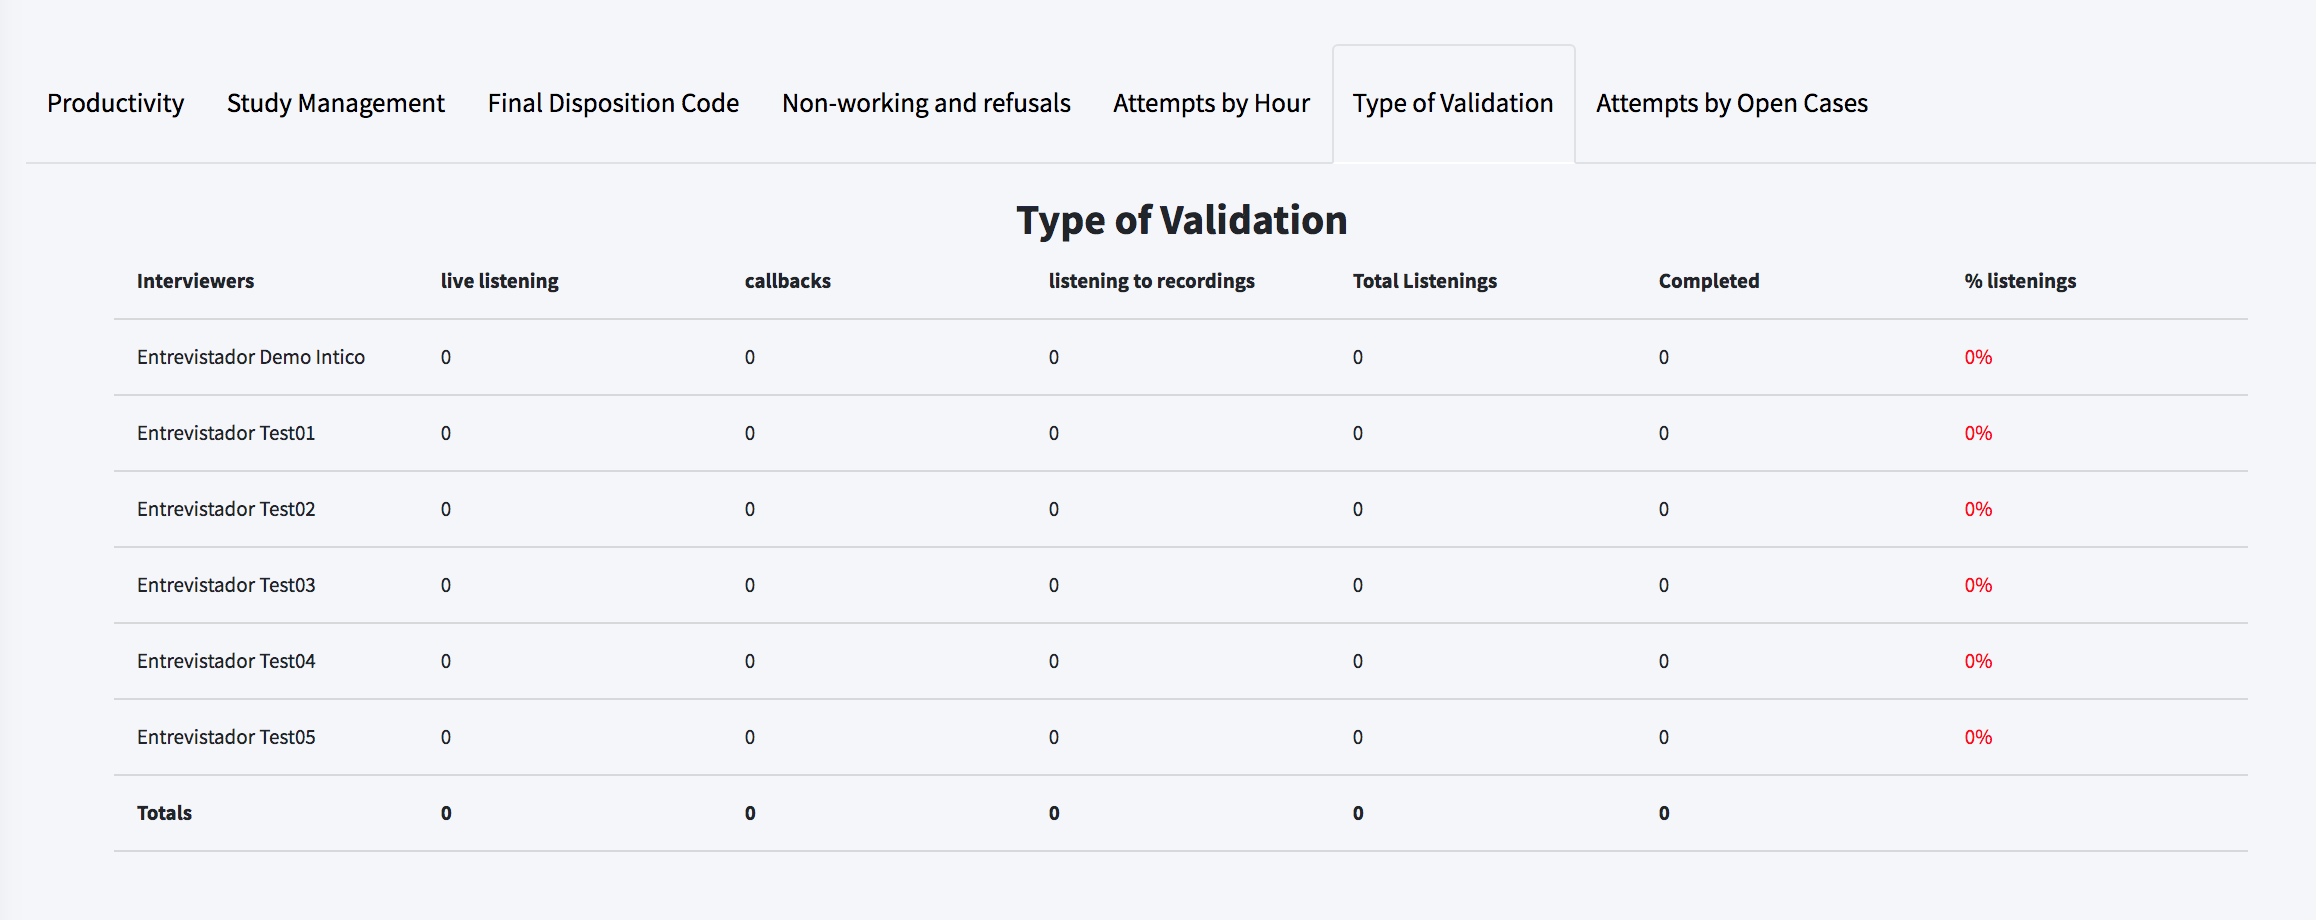
You can select to see results: Type of Validation
You can select to view results: Open Case Attempts

STUDY
Here you can see the entire list of studies conducted during the surveys.
You must click on "STUDY LIST" to continue:
STUDY LIST
The Study list is displayed:
It shows a detail view of the studies that are being carried out.
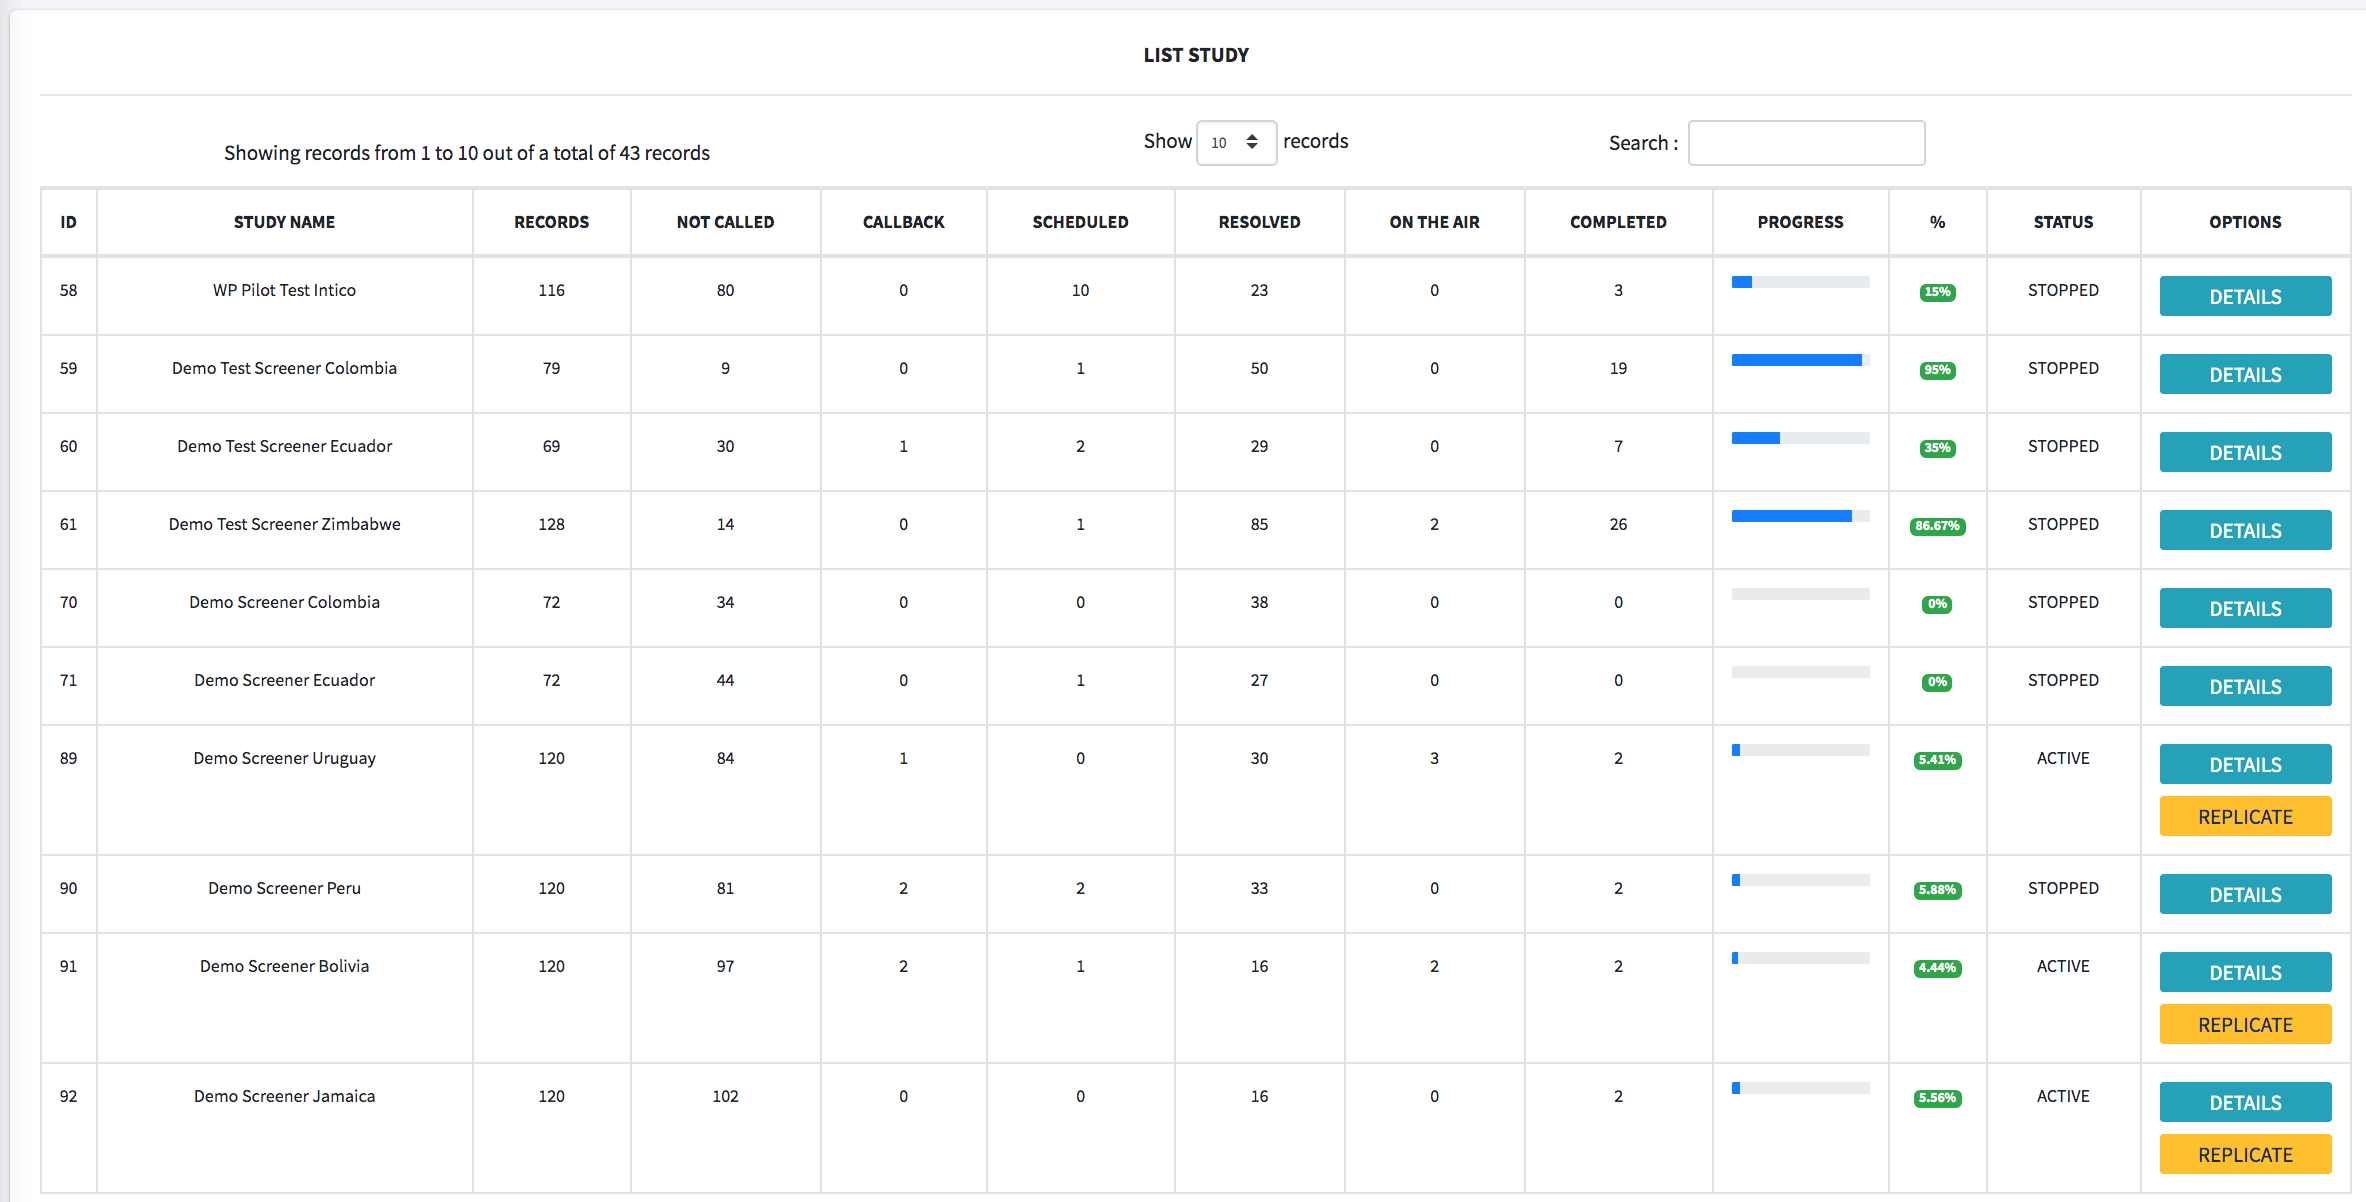
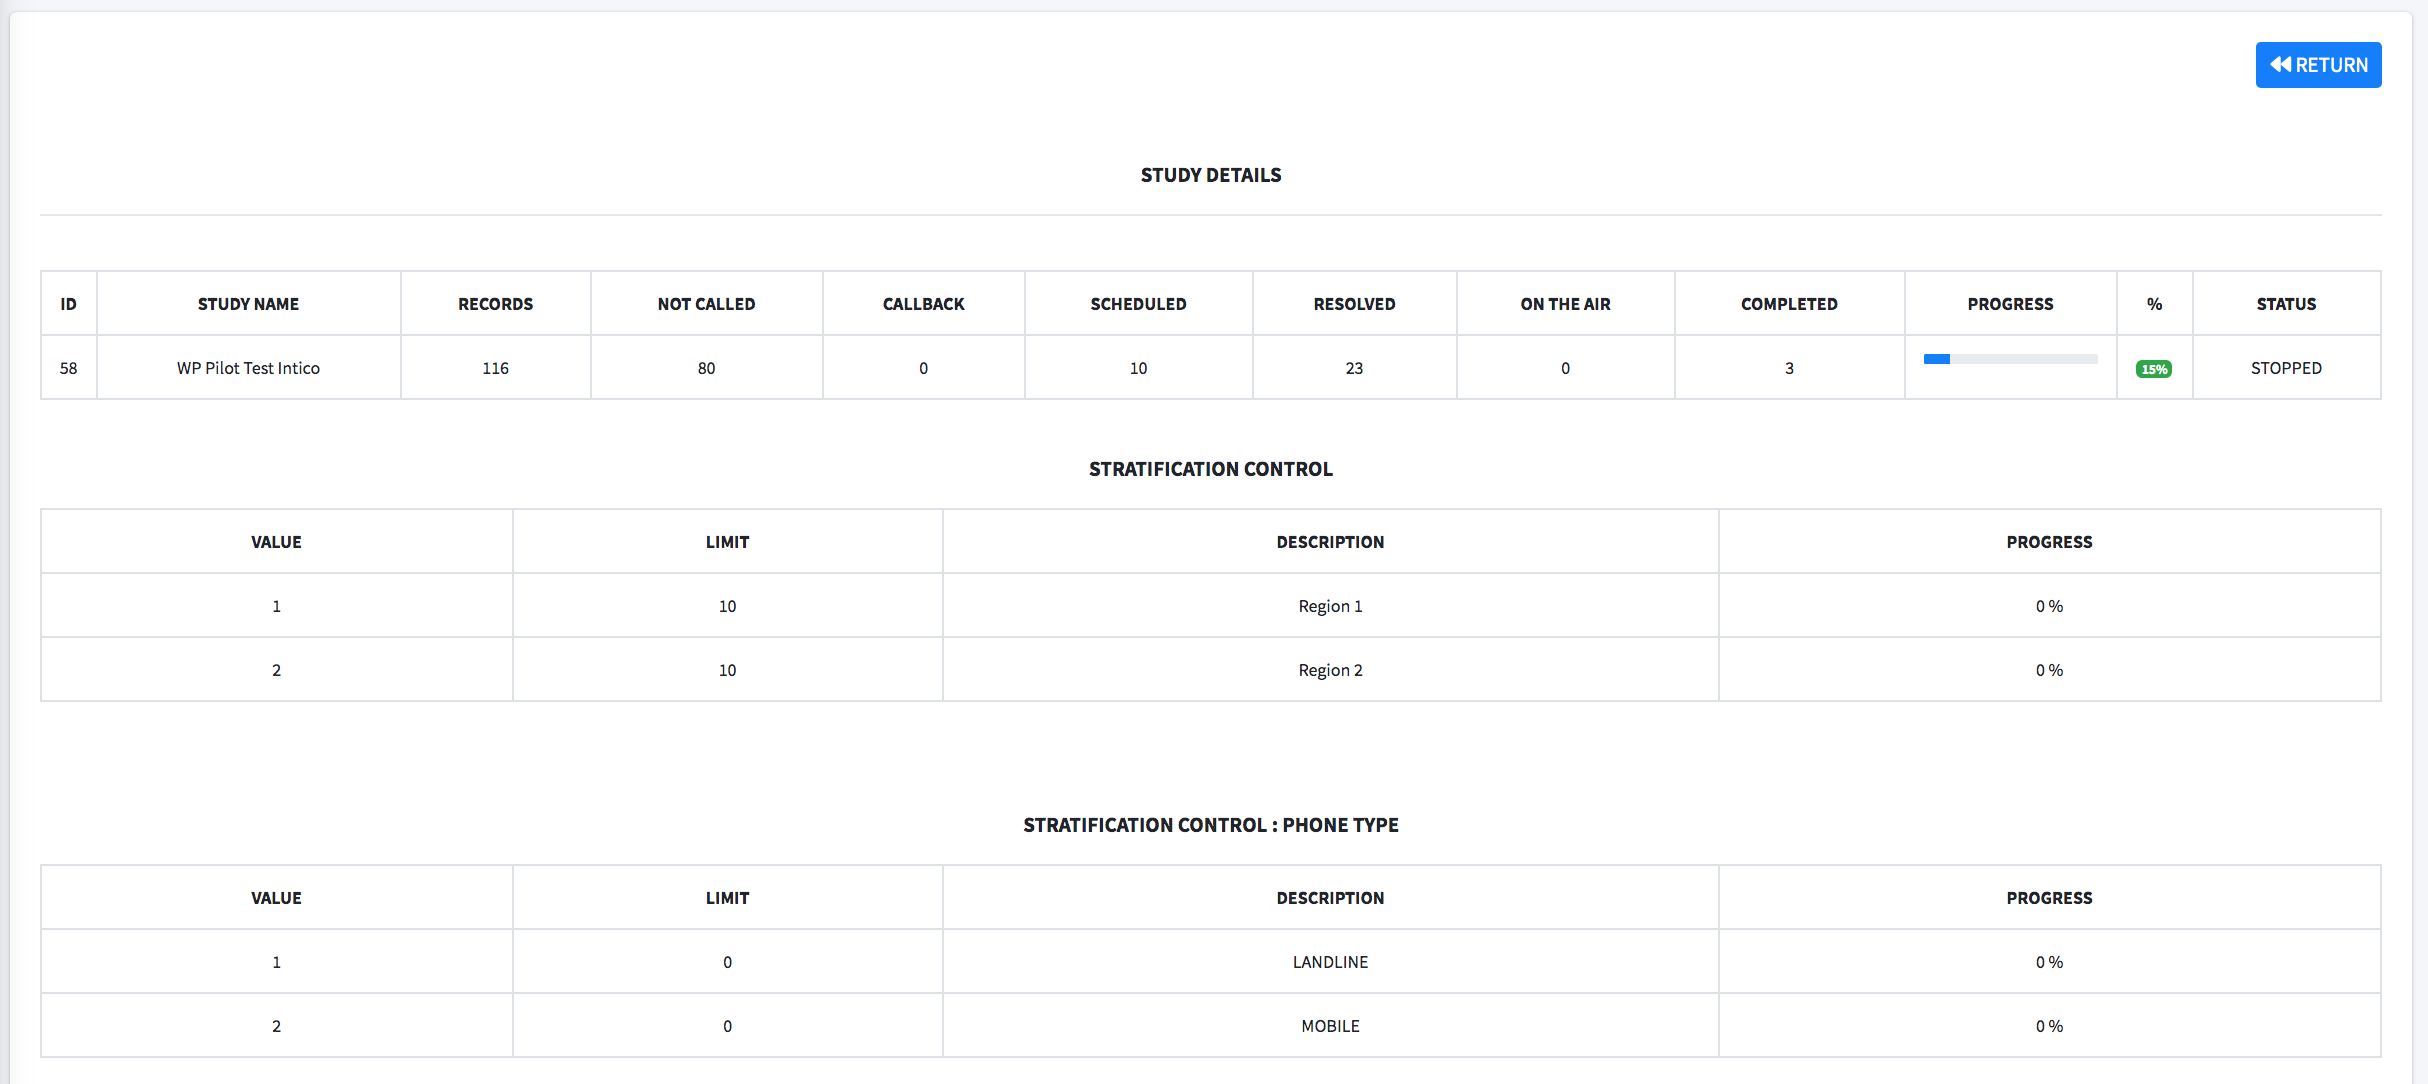
STUDY LIST DETAIL
ID: Unique code generated for each Study.
STUDY NAME: Label assigned to the Study.
RECORDS: Number of records in the Study.
NOT CALLED: Number of records not called.
CALL BACK: Number of records for future call back to complete the Study.
SCHEDULED: Number of records scheduled.
DO NOT CALL BACK: Number of records that should not be called back.
IN MANAGEMENT: Number of current records being managed.
COMPLETED: Number of records completed and filled in.
PROGRESS: Gradual line showing the detail of the Study according to the progress of the Interviewer.
PERCENTAGE: Percentage of the amount being advanced from 1 to 100%.
STATUS: Statuses can be Active and stopped.
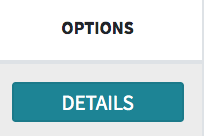
The detail of the study will be displayed.
Click "Return" to back to the study details view.

REPLICA
By clicking replicate
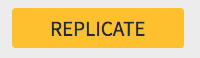
The details of the selected study will open and display the replication control. You will be able to see which replicas are active and which ones are inactive.
You also have the option to enter the number of replicas in the cell indicated below

Click Activate to update the replica.

Click Returno to back to the study list.

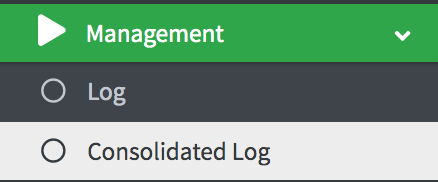
MANAGEMENT
In this tab you can see all the calls that have been made.
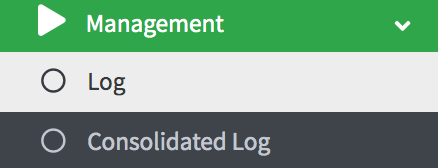
Click on "LOG".

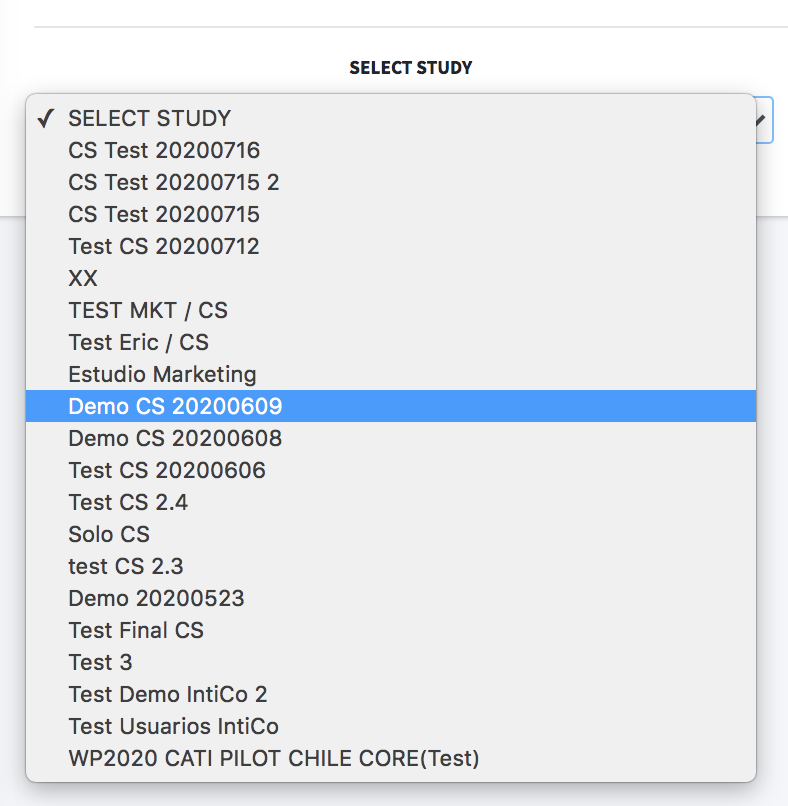
LOG
Here is the first view of the LOG:

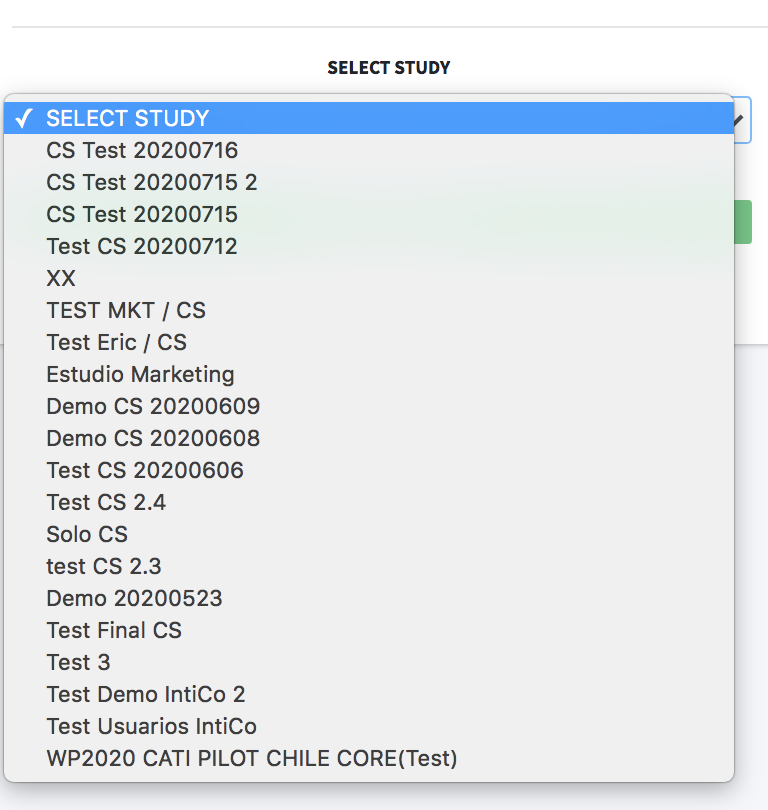
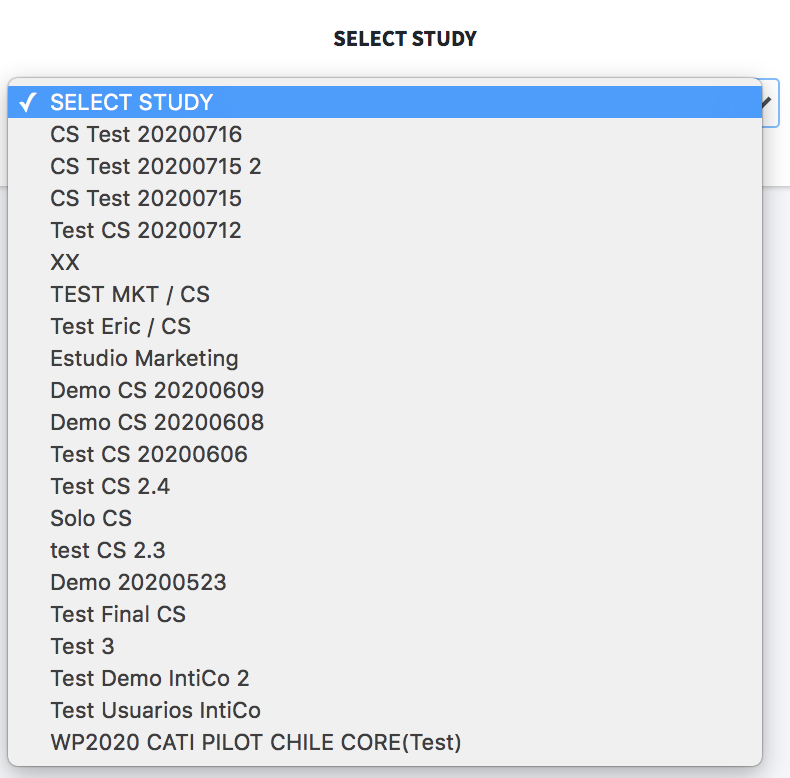
- SELECT STUDY: It will show you the list of studies carried out, you can select one of them.
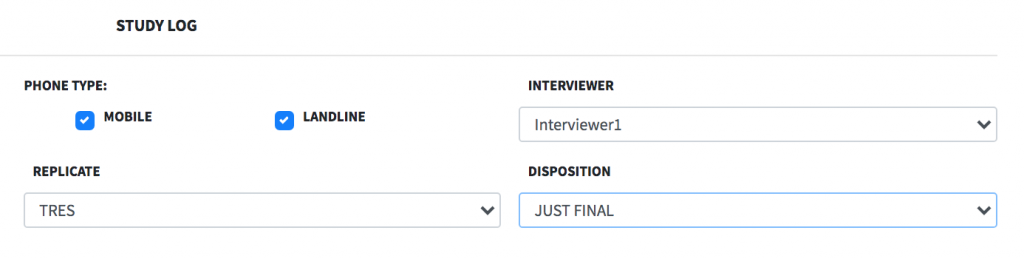
- PHONE TYPE: You can select the filters if it is a MOBILE LINE or a LANDLINE.
- REPLICATE: Segmentation of the data in groups, you can select each group.
- INTERVIEWER: You can filter the Interviewer.
- RESULTS: Shows the final results after the filters have been carried out. You have 2 Options: Total Results or Only the Completed Studies.
You must select a Study.
Then the detail of the selected Study will be shown.
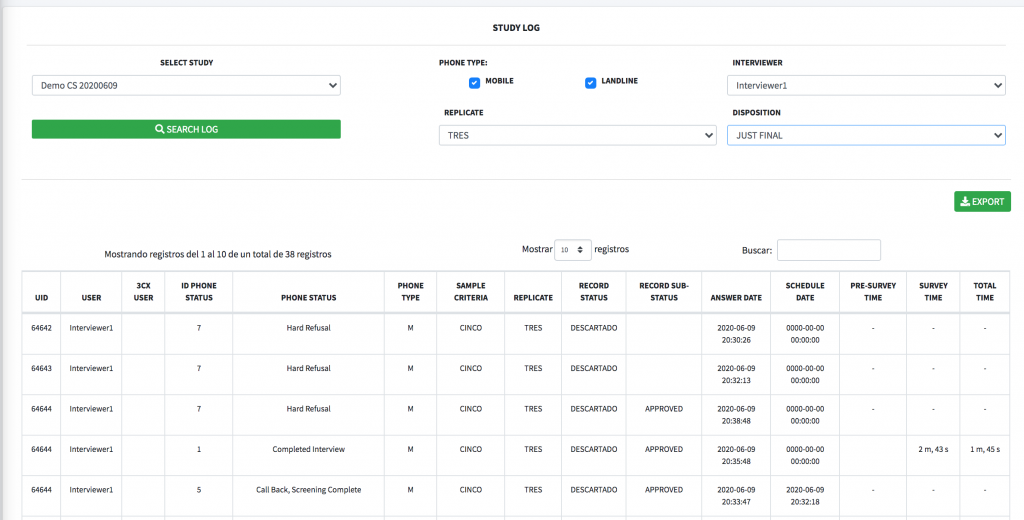
STUDY LOG DETAIL
ID: Unique code generated for each Study.
USER: User name.
3CX USER: 3CX user name.
CALL STATUS ID: There are 25 different call status IDs.
CALL STATUS: Description of the call status.
PHONE TYPE: Indicates if it is a Mobile or a Landline number.
SAMPLE CRITERIA: Sample Criteria ID code. Legend to be added.
REPLICATE: Segment of the total divided data.
RECORD STATUS: Details of the record status.
SUB STATUS RECORD: Detail of the sub status of the record.
RESPONSE DATE: Details of the response date of the Study.
DATE TO BE SCHEDULED: Detail of the date to be scheduled.
PRE-SURVEY TIME: Total time for the filter survey.
SURVEY TIME: Total time of the 3CX Final Study.
TOTAL TIME: Total sum of Pre-Survey time plus Survey time.
You can filter by REPLICATE, RESPONDENTS, RESULTS.
- PHONE TYPE: You can select the filters if it is a MOBILE LINE or a LANDLINE.
- REPLICATE: Segmentation of the data in groups, you can select each group.
- INTERVIEWER: You can filter the Interviewer.
- RESULTS: Shows the final results after the filters have been carried out. You have 2 Options: Total Results or Only the Completed Studies.
You can download the details of the study in Excel.
CONSOLIDATED LOG
On this tab you can view the consolidated version of the studies.
Then it will show you:

You must select a STUDY.
Select by Type of Phone or Replicate.
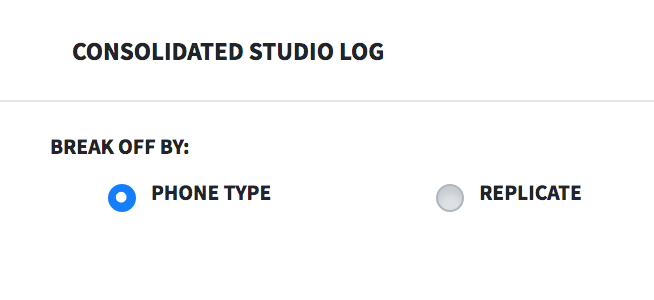
- TYPE OF PHONE: It will detail in full the mobile and landline telephones of the Study.
- REPLICATE: It will detail in its entirety the blocks or segments of the Study.
Click on "LOG SEARCH".

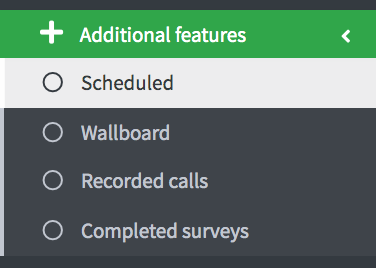
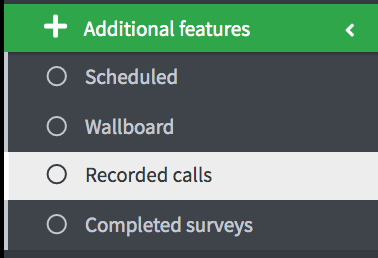
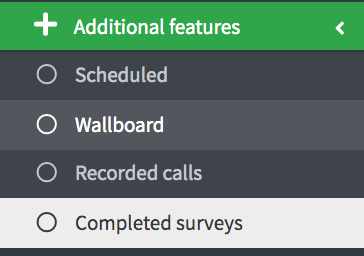
ADDITIONALS
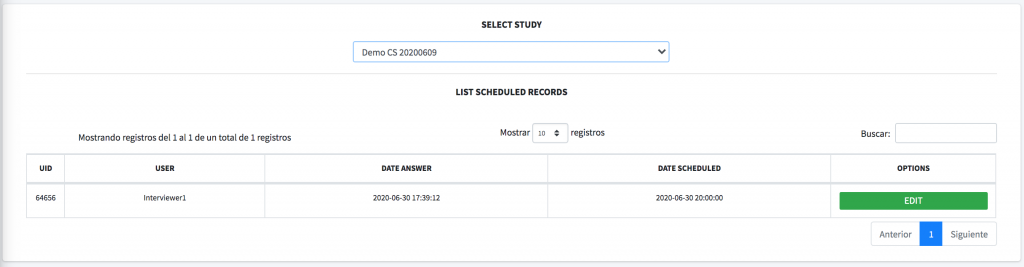
SCHEDULED
The Scheduled module has the function of helping the supervising users to update the date and time of a scheduled interview. One of the reasons for using this function is due to an error on the part of the interviewer user when scheduling the interview or a change in the interview.
A list is displayed, to select Study
Then it shows the following screen and gives us the option to EDIT it. The Edit feature only works when an interviewer mistakenly scheduled a record with the wrong date or time.
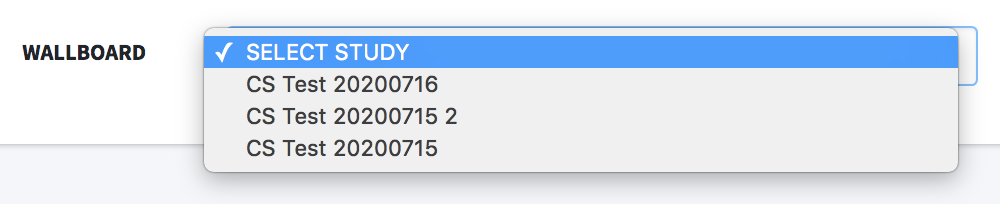
WALLBOARD
When you click on Wallboard, it will open all the Studies that have been performed during the day. Dashboard allows you to monitor all managed studies online. So you can see the progress of each Survey.
Depending on the case, you also have the option to pause or stop the Study.
Here is the first view of the LOG:

IT SHOWS THE FOLLOWING:

SELECT THE STUDY IN THE DASHBOARD LIST.
The selected Study is displayed, you have the option to "pause" and "stop" the monitor.
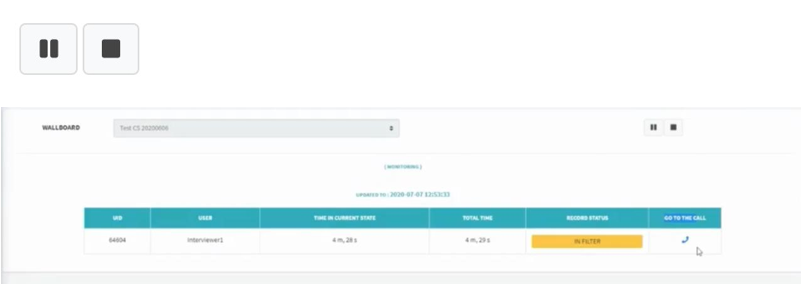
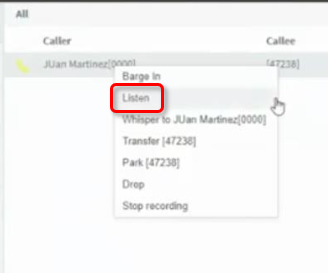
The main function of this Dashboard tab is to be able to monitor what the interviewer is doing. You can access it by clicking on the "GO TO THE CALL" button, and if you are logged in, you will go directly to the monitoring dashboard. Then the Survey monitoring dashboard will open. You will enter with the username and password previously given to you.

After entering the monitoring panel you can select which Supervisor you are going to listen to.
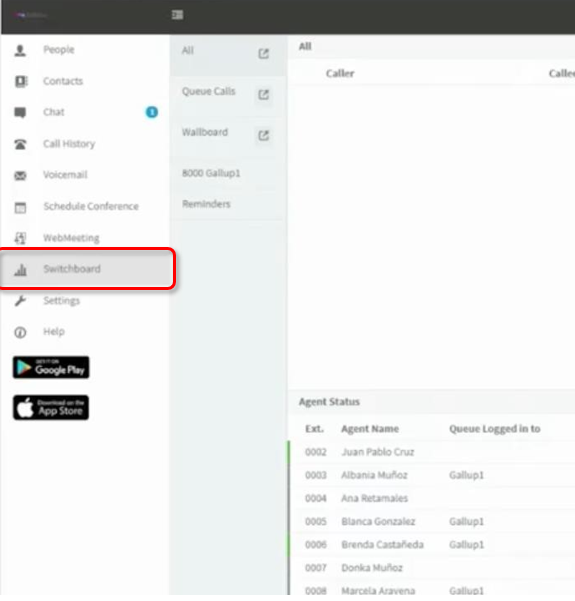
Find the Switchboard tab and then choose the corresponding Supervisor, right click and press on "Listen".
RECORDED CALLS
When you click on recorded calls, it will open all the audios from the studies you have made and you will be able to listen to them. This module allows you to monitor all the recorded studies online. This way you can see the progress of each Survey.
You also have to listen to the recordings.
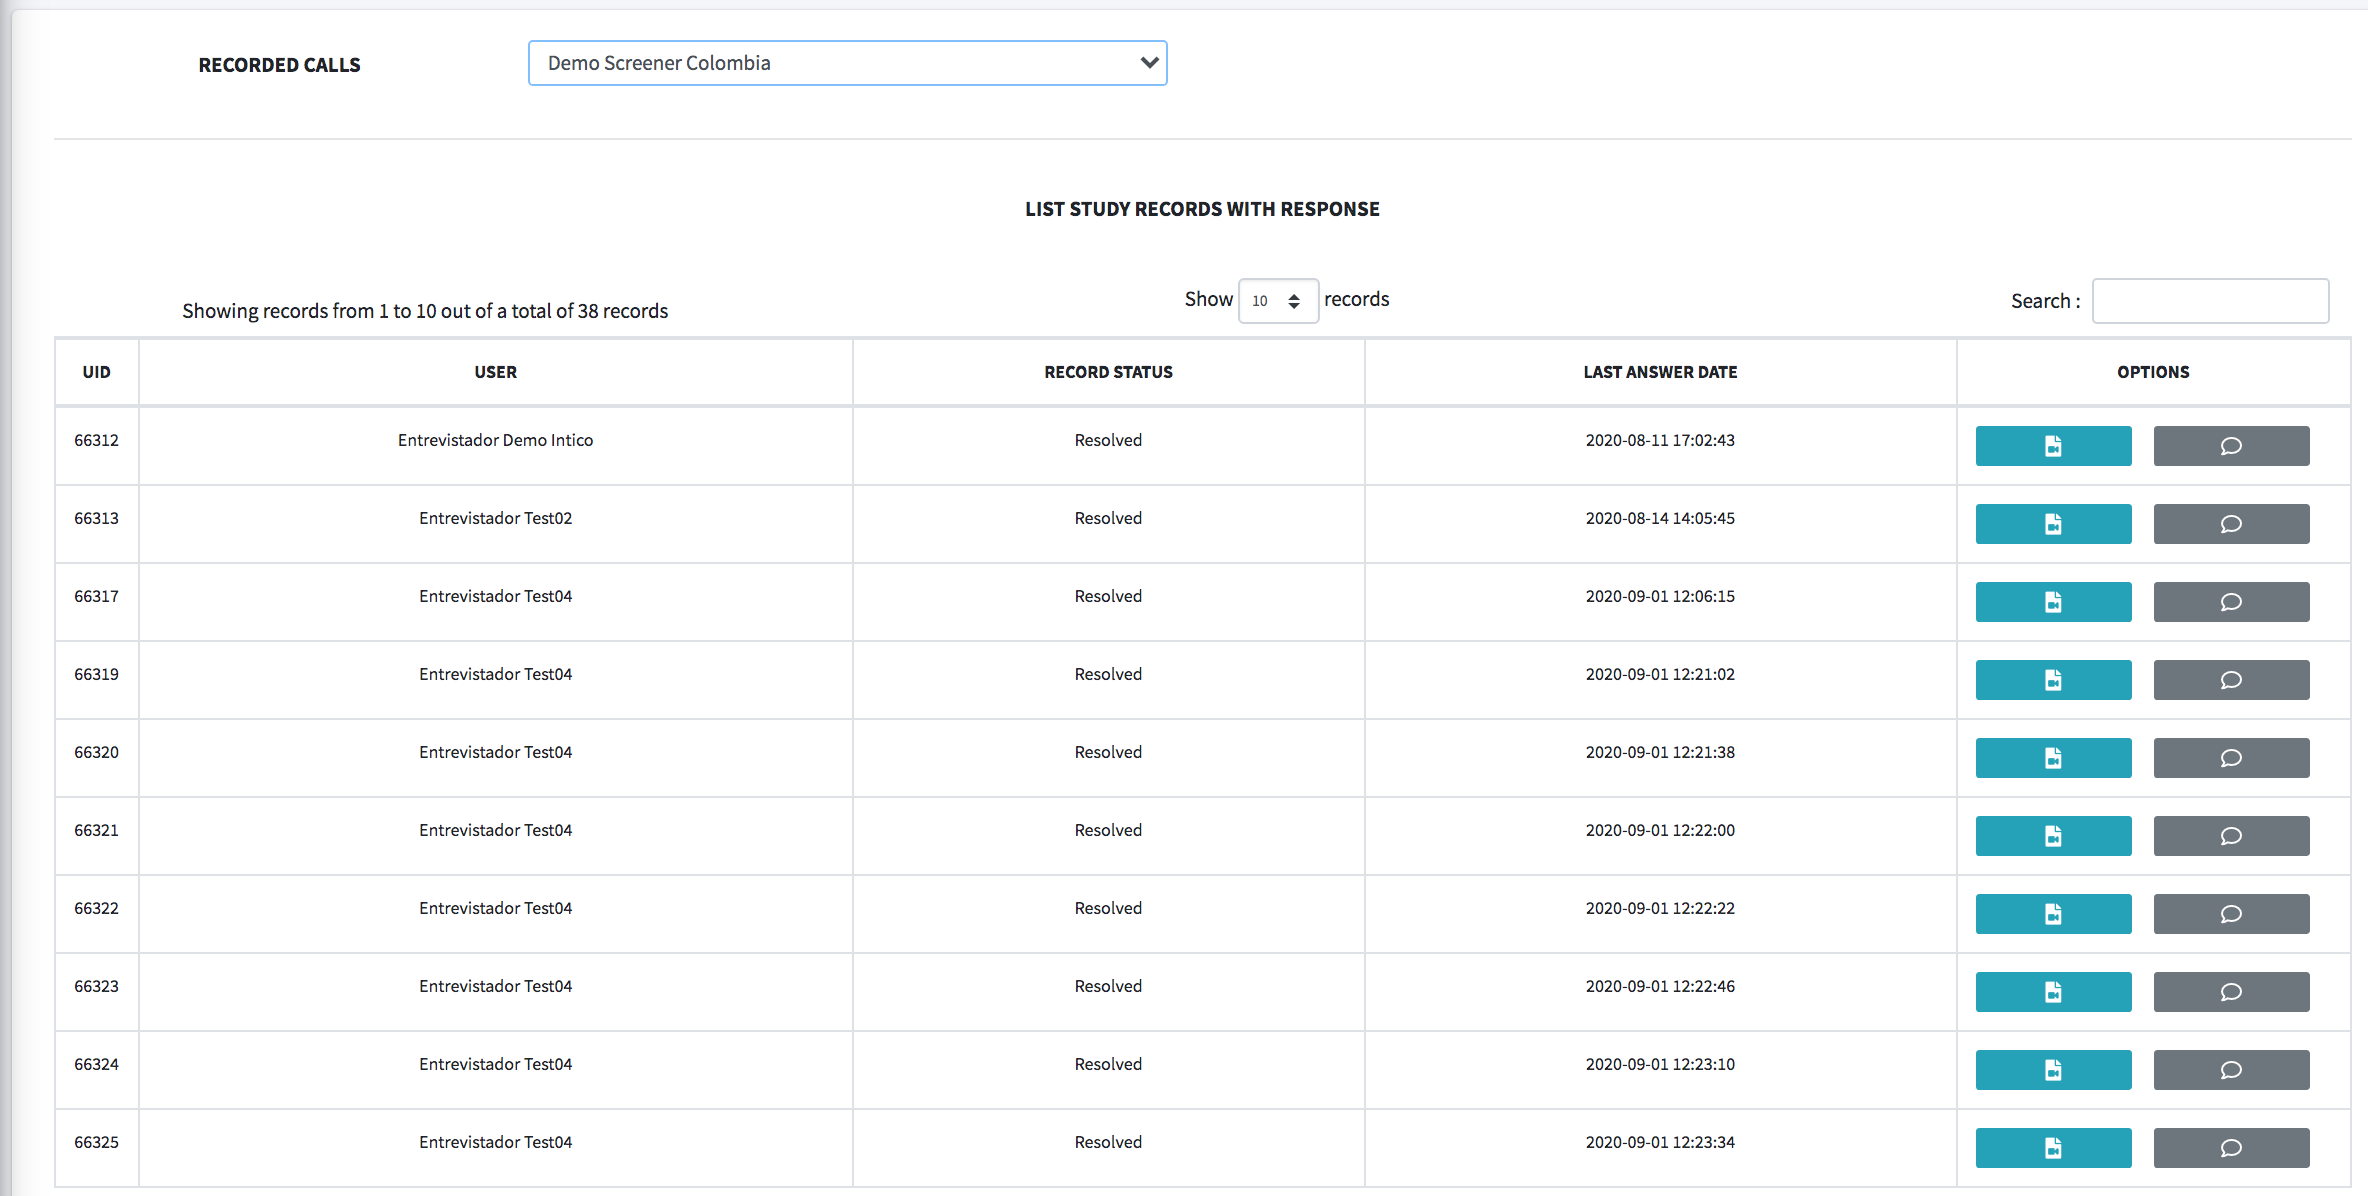
Click icon to listen to the recording.

COMPLETED SURVEYS
When you click on completed surveys, it will open the detail of each completed survey, you have the options to call, cancel surveys and click on QC.
Select the Study you want to review

A screen will open with the corresponding information
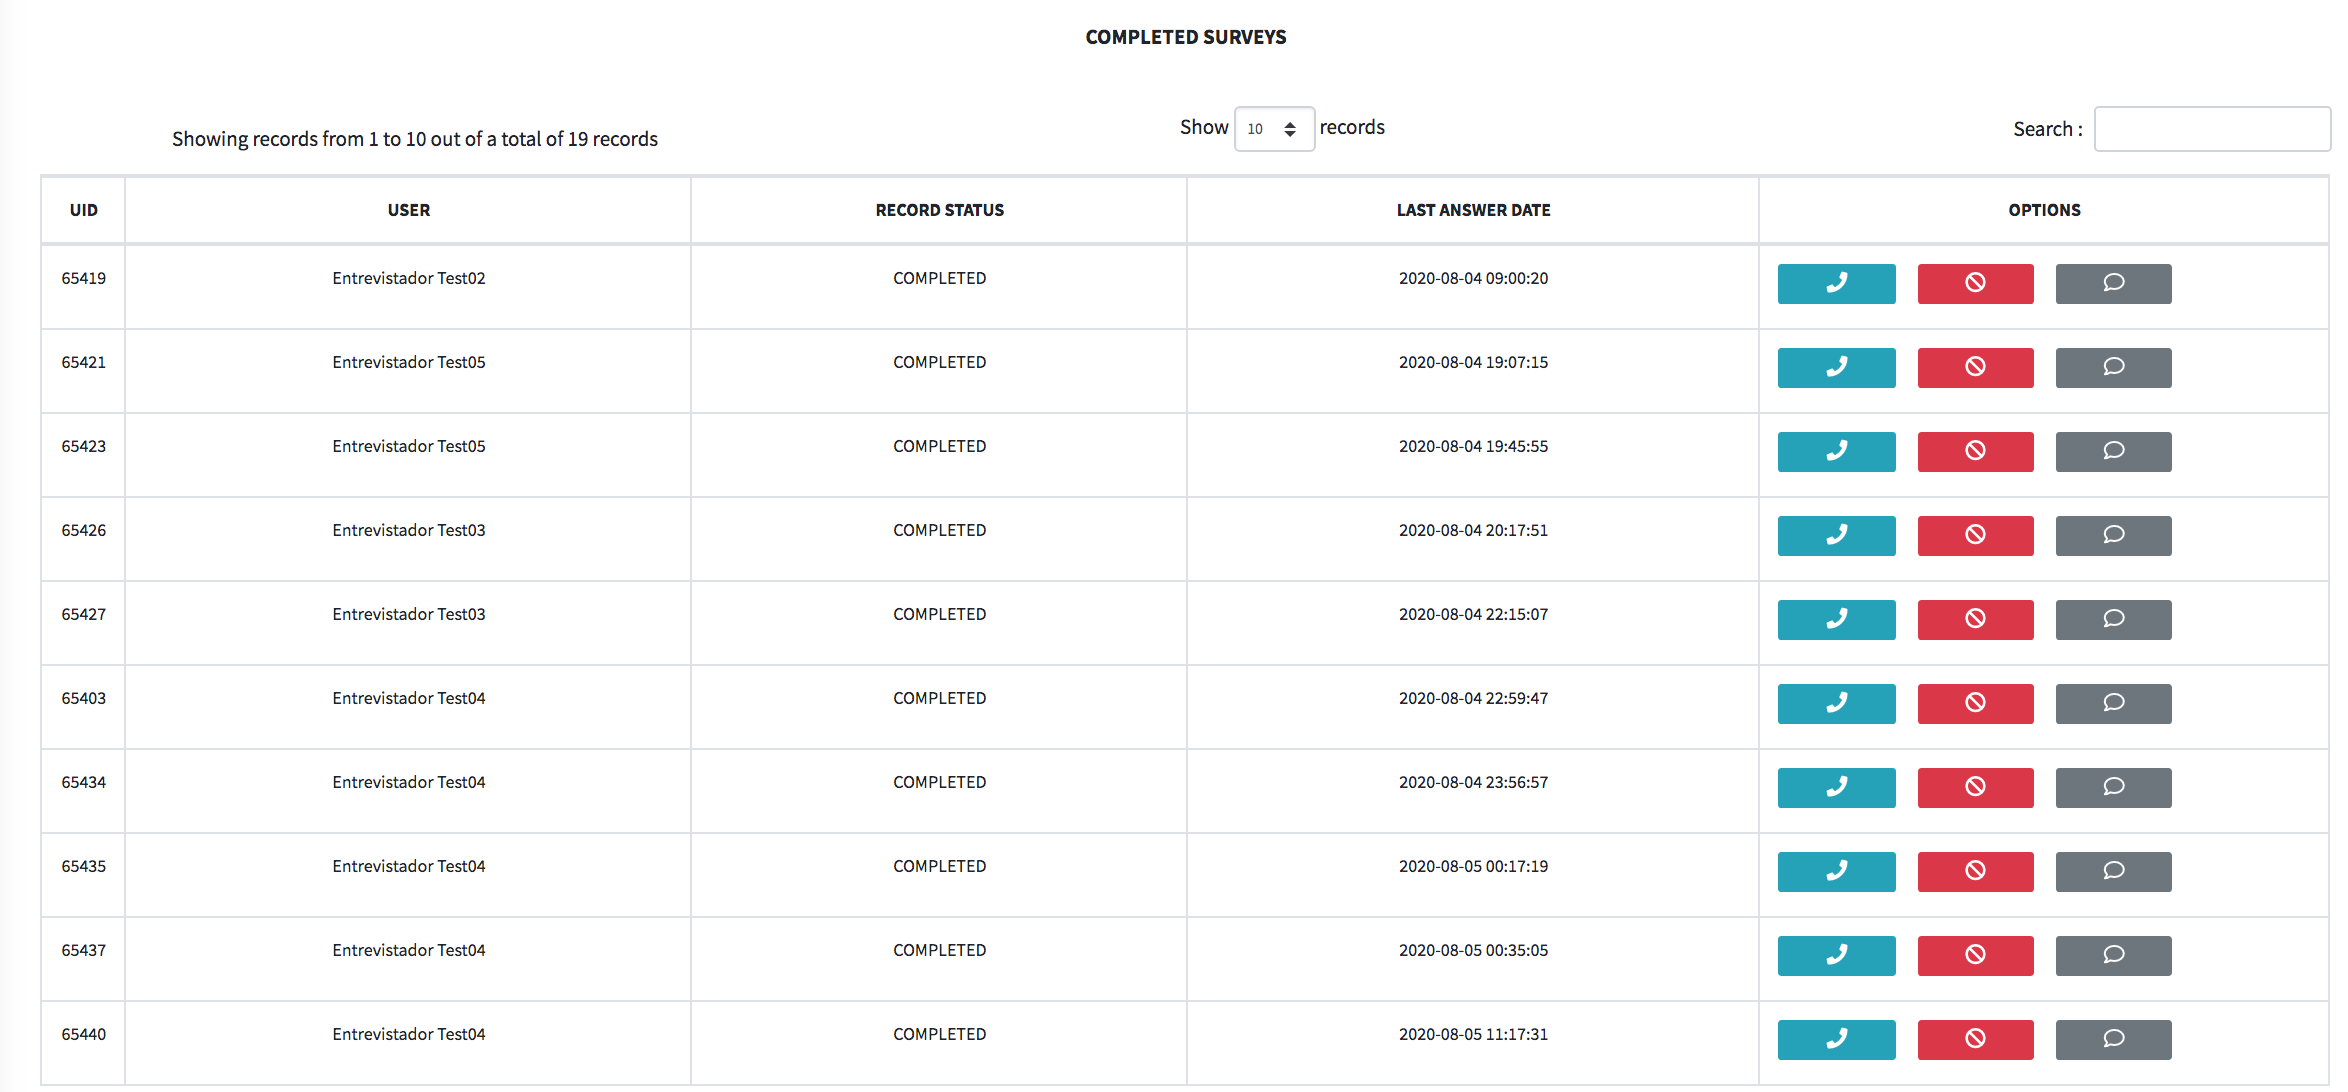
CALL to check if the data is real.

MARK SURVEY CANCELLED

QC - To validate the questionnaire

AJUSTES
DAY PARTS
The configuration module shows us the data of the studies, active or inactive, what days of the week each campaign is carried out, hours and end of the study, the name of each part and a unique correlative ID for each DayPart. After clicking on Time Slots

It will show us the following screen.
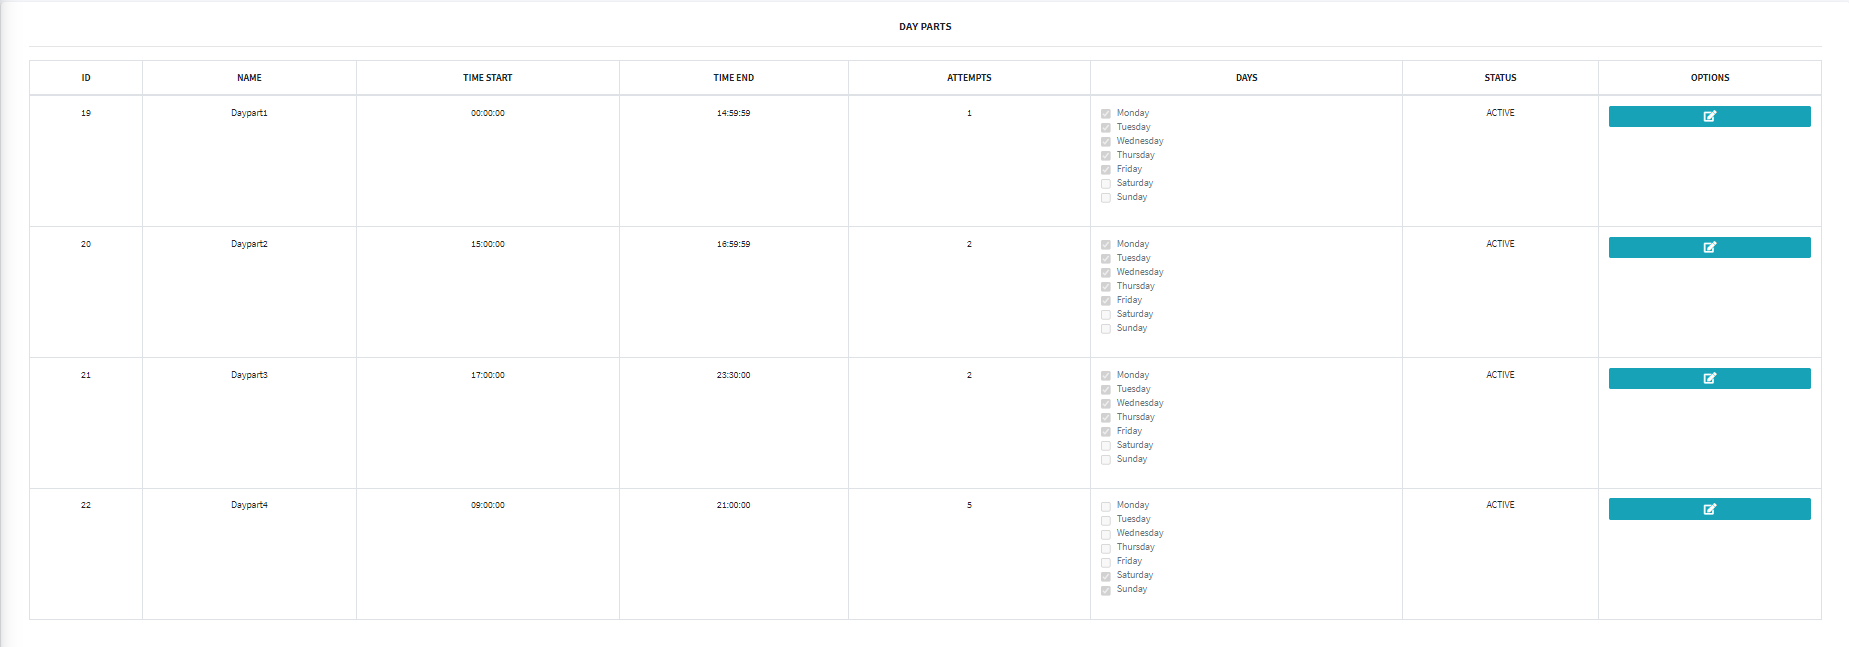
DAYPART DETAIL
ID: Unique code generated for each DayPart.
NAME: Label assigned to the DayPart.
TIME START: Scheduled time for the start of the Study.
TIME END: Scheduled time for the completion of the Study.
ATTEMPTS: Count of call attempts.
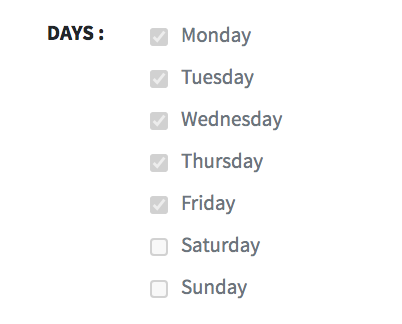
DAYS: Selection of days on which the campaign will be scheduled. They are usually from Monday to Friday.
STATUS: The status can be Active or Inactive, which will indicate if the DayPart is in the process of management or not.
OPTIONS: In this button you will have the option to program and configure a new time for the Start and End of each DayPart, following the corresponding steps:
Click the Edit button under Options.
The following window will open and you can only set the start and end time, then click confirm to record the new date and time of the DayPart.
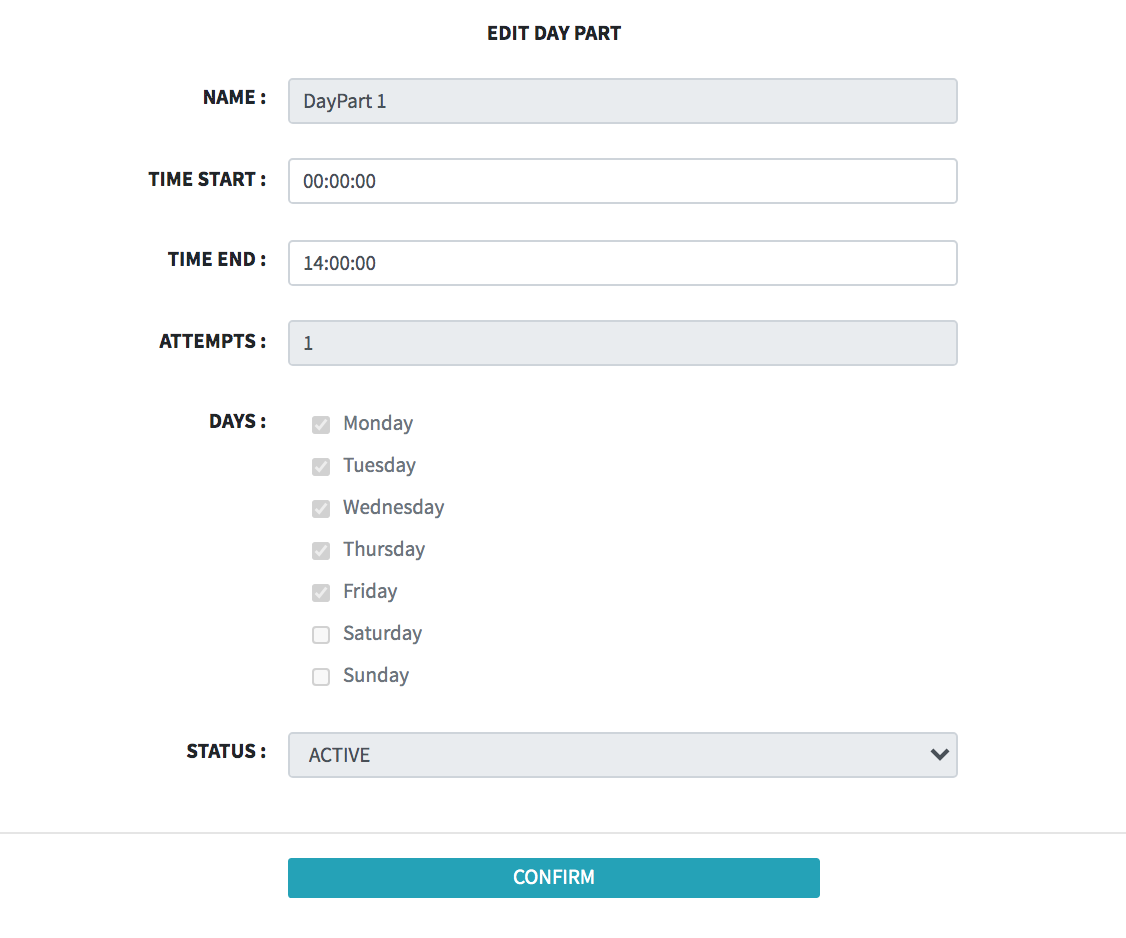
You will not be able to reissue the name.

Select a new start time.

Select a new end time

You will not be able to edit the number of attempts again, as these are added automatically.

You will not be able to edit or select new days of the week, this information is filled in automatically.
You will not be able to edit the DayPart declarations again.

Then click Confirm

